unknown
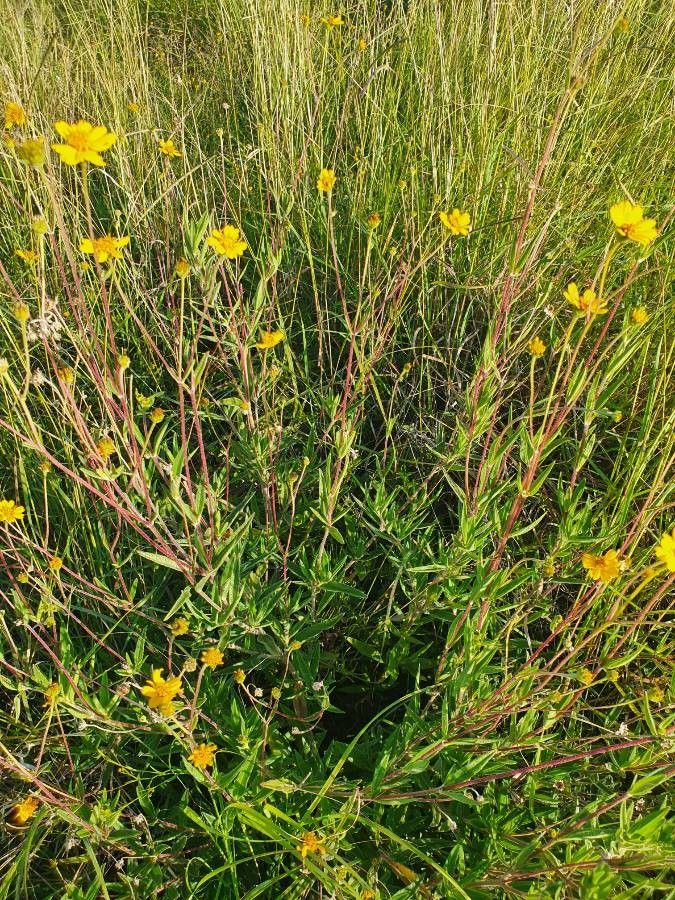
aspilia mossambicensis
Also known as: []
Overview
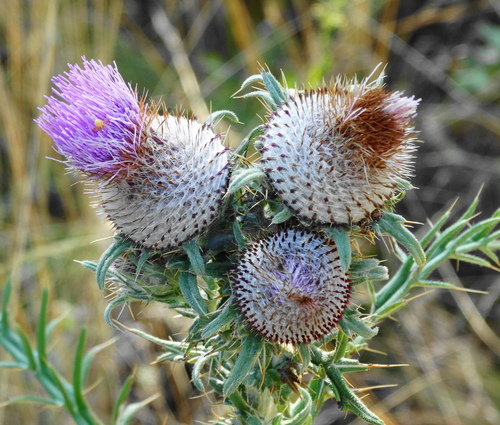
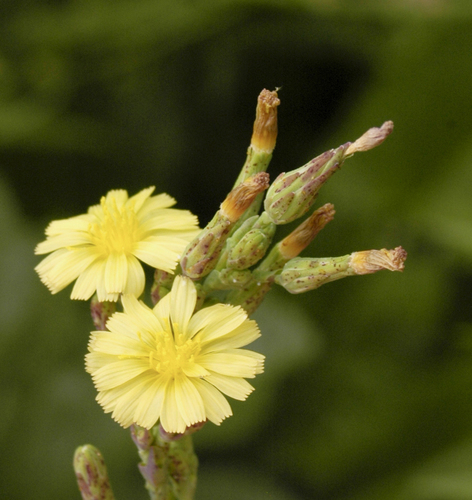
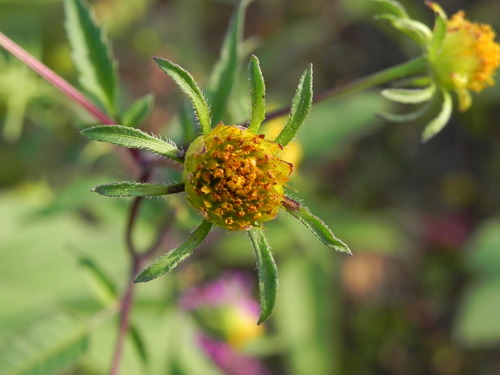
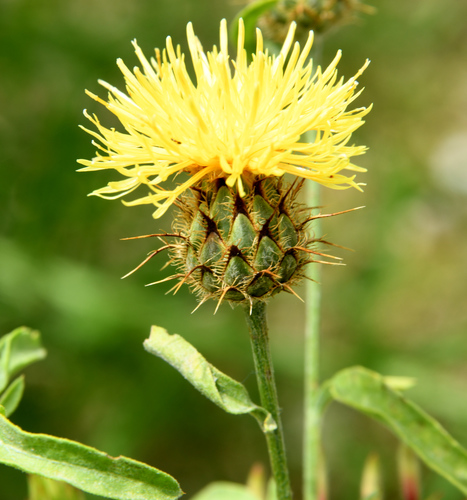
A species of flowering plant in the family Asteraceae, native to Mozambique.
Benefits & Perks
["wildlife attractant (bees, butterflies, birds)"]
Botanical Classification
| Phylum: | Magnoliophyta |
| Class: | Magnoliopsida |
| Order: | Asterales |
| Family: | Asteraceae |
| Genus: | Aspilia |
| Botanical Name: | Aspilia mossambicensis |
Plant Characteristics
Basic Information
- Category: Flowers
- Suitable Location: outdoor garden bed in a warm, sunny area
- Suitable For:
- Is Weed: No
- Allergenicity: low
Environmental Needs
- Climate: {"temperatureRange":"15–30°C"}
- Hardiness: {"zones":"9–11"}
- Misting: rarely required, only if ambient humidity is very low
- Drainage: Fast-draining to prevent waterlogging and root rot.
- Soil Type: Well-draining, loamy soil with added organic matter; a mix of cactus/succulent soil with compost works well.
Maintenance Level
- Maintenance Level: moderate
- Toughness Level: moderate
- Pruning Frequency: Light pruning can be done every 4–6 weeks during the growing season; major pruning should be done annually in early spring.
- Pruning Intensity: Light to moderate; avoid heavy pruning unless necessary to control size or shape.
Care Details
Ideal Sunlight Coverage:
Bright indirect light for 6–8 hours daily; can tolerate some direct morning sun but avoid harsh afternoon sun.
Sunlight Tolerance Tips:
Acclimate plants gradually to direct sunlight to prevent scorching; for indoor placement, rotate the plant weekly for even light exposure; for outdoor placement, provide shade during peak afternoon hours.
Care Requirements
Care Difficulty
moderatemoderate
Sunlight
full sun to partial shade
Use sheer curtains to filter intense light; place near an east-facing window for optimal indirect light; avoid west-facing windows in summer.
Watering
every 7–10 days during active growth, reduce in winter
Water thoroughly until it drains from the bottom; allow soil to dry between waterings; avoid wetting foliage.
Soil
well-draining, sandy loam with some organic matter
pH: Slightly acidic to neutral (pH 6.0–7.0).
Use a pot with drainage holes; avoid overwatering; periodically check soil pH; amend soil with organic matter annually.
Temperature
Prefers warm temperatures between 65–85°F (18–29°C); tolerates mild fluctuations but dislikes prolonged exposure to extreme heat or cold.
Use a thermometer to monitor plant environment; group plants to create a microclimate; adjust watering based on temperature changes.
Fertilizing
every 4–6 weeks during growing season, none in winter
Always water before fertilizing to prevent root burn; flush soil occasionally to prevent salt buildup; choose a fertilizer with micronutrients for balanced growth.
Propagation
Methods
Stem cuttings are the most reliable method; can also be propagated by division if the plant has formed clumps.
Step-by-Step Propagation Guide
- Take a 4–6 inch stem cutting just below a node.
- Remove lower leaves to expose the node.
- Dip in rooting hormone.
- Plant in the propagation medium.
- Maintain high humidity and warmth.
Best Time: Spring or early summer when the plant is actively growing; avoid propagation during dormancy.
Environment
High humidity (70–80%), warm temperatures (75–85°F or 24–29°C), and bright indirect light are ideal for rooting.
Medium
A mix of peat moss and perlite (1:1 ratio) or a well-draining cactus/succulent mix.
Hormone
Rooting hormone is recommended to speed up root development and improve success rates.
Timeline
Roots typically develop within 2–4 weeks; new growth may appear after 6–8 weeks; full establishment takes 3–4 months.
Tools Needed
Sharp pruning shears, rooting hormone, small pots, propagation medium, plastic bags or humidity dome, misting bottle.
Quick Tips
Use a clean, sharp tool to avoid introducing pathogens; maintain consistent moisture in the medium; provide bottom heat if possible to encourage faster rooting.
Pruning & Repotting
Pruning Guide
Method
Use clean, sharp tools to make cuts just above a leaf node or bud; remove any crossing or rubbing branches to improve air circulation.
Pruning Plan
Prune to maintain shape, encourage bushier growth, and remove dead or diseased parts; focus on removing leggy stems and spent flowers.
Tools
Pruning shears, sterilizing solution (70% alcohol), gloves, small brush for cleaning cuts.
Checklist
Sterilize tools before and after use; prune during the growing season; remove dead or diseased parts first; make clean cuts just above nodes.
Repotting Guide
Best Season
Early spring before the active growing season begins; this allows the plant to recover quickly.
Pot Size
Choose a pot that is 1–2 inches larger in diameter than the current pot; ensure it has adequate drainage holes.
Method
Gently remove the plant from its pot; trim any circling roots; place in a new pot with fresh soil mix; water thoroughly after repotting.
Suggestions
Repot every 2–3 years or when the plant becomes root-bound; signs include roots growing out of drainage holes or slow growth.
Checklist
Select appropriate pot size; prepare fresh soil mix; trim roots if necessary; water after repotting; place in a shaded area for a few days to recover.
Advanced Care Tips
Watering Mastery
Watering Checklist
Check soil moisture before watering; water deeply and slowly; ensure proper drainage; adjust frequency based on season and growth stage.
How to Apply Water Properly
Water directly at the root zone, ensuring even saturation to a depth of 6–8 inches; water early in the morning to minimize evaporation and fungal growth; ensure excess water drains away to prevent waterlogging.
Watering Schedule Tips
Water deeply once the top 1–2 inches of soil are dry; reduce frequency in winter to prevent root rot.
Soil Improvement
Add perlite or coarse sand to improve drainage; incorporate compost or well-rotted manure to enhance fertility and structure; ensure the top layer is not compacted.
Temperature Stress Management
Signs of Temperature Issues
Yellowing leaves, wilting, or leaf drop for cold stress; scorching, leaf curling, or stunted growth for heat stress.
Cold Stress
Low temperatures slow metabolic processes, leading to reduced growth and potential root damage; prolonged cold can cause leaf drop and dormancy.
Solution: Move the plant to a warmer location; provide a heat source if necessary; avoid placing near drafty windows or doors.
Hot Stress
Excessive heat increases transpiration, leading to dehydration and wilting; can cause leaf scorch and reduced vigor.
Solution: Increase humidity around the plant; provide shade during peak heat; water more frequently but ensure proper drainage.
Fertilizing Guide
Fertilizing Checklist
Use diluted fertilizer; apply during active growth; avoid winter fertilization; flush soil periodically.
Fertilizing Method
Use a balanced liquid fertilizer diluted to half strength every 4–6 weeks during the growing season (spring and summer); avoid fertilizing in fall and winter.
Common Problems & Solutions
Toxicity Warning
Cats
Non-toxicAspilia mossambicensis is not known to be toxic to cats. There are no reported cases of adverse effects following ingestion or contact with this plant.
⚡ Toxic If:
None
Dogs
Non-toxicAspilia mossambicensis is not known to be toxic to dogs. There are no reported cases of adverse effects following ingestion or contact with this plant.
⚡ Toxic If:
None
Humans
Non-toxicAspilia mossambicensis is not known to exhibit toxic properties to humans under normal conditions. It has not been documented to cause adverse physiological effects.
⚡ Toxic If:
None
Frequently Asked Questions
Q: Is Aspilia mossambicensis toxic to pets?
A: Unknown, no specific studies are available.
Q: How often should I water Aspilia mossambicensis?
A: Moderately, allowing the soil to dry slightly between waterings.
Q: Does Aspilia mossambicensis attract wildlife?
A: Yes, it can attract bees and butterflies.
Quick Reference


| Family: | Asteraceae |
| Care: | moderate |
| Light: | full sun to partial shade |
| Water: | every 7–10 days during activ |
Get Expert Care Tips
Download the Plantious app for personalized care reminders and plant identification!
Google Play App Store