Australian Echeveria
echeveria australis
Also known as: ["Australian Hen and Chicks"]
Overview
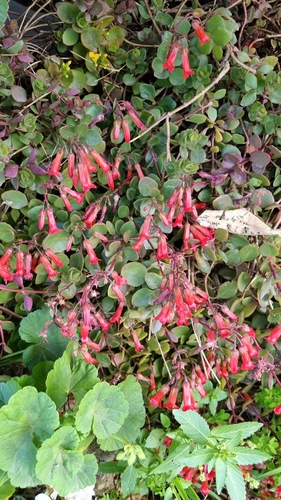
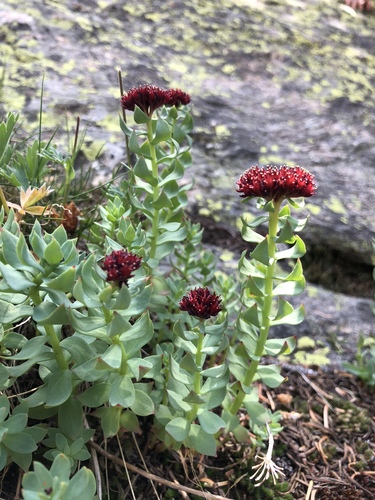
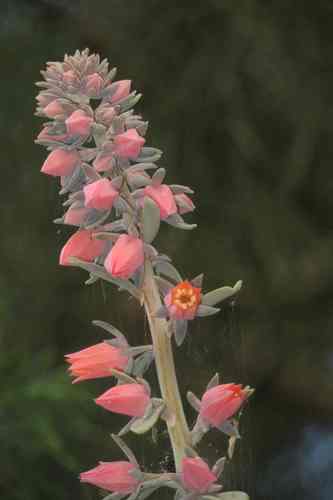
A rosette-forming succulent with powdery blue-green leaves and bell-shaped orange flowers on tall stalks.
Benefits & Perks
["drought tolerant","low maintenance","aesthetic foliage","rare/collector’s item"]
Botanical Classification
| Phylum: | Magnoliophyta |
| Class: | Magnoliopsida |
| Order: | Saxifragales |
| Family: | Crassulaceae |
| Genus: | Echeveria |
| Botanical Name: | Echeveria australis |
Plant Characteristics
Basic Information
- Category: Succulents & Cacti
- Suitable Location: indoor pot with bright, indirect light or outdoor garden in a sunny, sheltered spot
- Suitable For:
- Is Weed: No
- Allergenicity: low
Environmental Needs
- Climate: {"temperatureRange":"5–35°C"}
- Hardiness: {"zones":"9–11"}
- Misting: rarely required, only if ambient humidity is very low
- Drainage: Fast-draining; must avoid waterlogged conditions.
- Soil Type: Well-draining succulent or cactus mix; can add pumice or perlite for extra drainage.
Maintenance Level
- Maintenance Level: very low
- Toughness Level: high
- Pruning Frequency: As needed, typically every 6–12 months or after flowering.
- Pruning Intensity: Light to moderate; remove only dead leaves or stems unless reshaping is required.
Care Details
Ideal Sunlight Coverage:
Bright indirect light for 6–8 hours daily; can tolerate direct morning sun but avoid harsh afternoon sun, especially in summer.
Sunlight Tolerance Tips:
Acclimate plants gradually to direct sun to prevent scorching; place indoors near south-facing windows with sheer curtains; move outdoors to a shaded patio during warmer months.
Care Requirements
Care Difficulty
easyeasy
Sunlight
full sun to partial shade
Rotate plant weekly for even growth; provide shade during peak summer hours; monitor for signs of sunburn or etiolation.
Watering
every 7–10 days during active growth, reduce to every 3–4 weeks in winter
Water deeply but infrequently; ensure soil dries completely between waterings; avoid overhead watering to prevent leaf rot.
Soil
well-draining, sandy cactus mix
pH: Slightly acidic to neutral (6.0–7.0).
Use pots with drainage holes; avoid heavy garden soil; ensure soil dries between waterings.
Temperature
Ideal range 65–80°F (18–27°C); tolerates mild frost but prefers warmer conditions; reduce watering in cooler temperatures.
Avoid placing near drafty windows or air vents; adjust watering with temperature changes; monitor for signs of stress.
Fertilizing
every 4–6 weeks during spring and summer with diluted succulent fertilizer
Never fertilize a dry plant; flush soil occasionally to prevent salt buildup; stop fertilizing when growth slows.
Propagation
Methods
Stem cuttings or leaf cuttings; stem cuttings are faster and more reliable.
Step-by-Step Propagation Guide
- Select healthy leaves/stems.
- Let cuttings callus for 1–2 days.
- Plant in medium.
- Water sparingly until roots form.
Best Time: Spring or early summer when the plant is actively growing.
Environment
Warm (70–75°F), humid (50–60%), bright indirect light; protect from direct sun and drafts.
Medium
Well-draining mix of cactus soil and perlite (1:1 ratio); can also use succulent-specific propagation medium.
Hormone
Optional but recommended for faster rooting; use a rooting hormone powder or gel.
Timeline
Leaf cuttings: 4–6 weeks for roots; stem cuttings: 2–4 weeks for roots, 2–3 months to establish.
Tools Needed
Clean knife or scissors, rooting hormone, propagation medium, small pots, humidity dome (optional).
Quick Tips
Do not overwater cuttings; use clean tools to prevent disease; provide bottom heat for faster rooting.
Pruning & Repotting
Pruning Guide
Method
Snip off dead leaves at the base; trim leggy stems to encourage bushier growth; avoid cutting into the main rosette.
Pruning Plan
Remove dead or damaged leaves to improve appearance and prevent rot; shape the plant to encourage compact growth.
Tools
Clean, sharp scissors or pruning shears; sterilizing solution (optional).
Checklist
Sterilize tools; prune dead/damaged parts; avoid over-pruning; clean up fallen debris.
Repotting Guide
Best Season
Spring, before the growing season begins.
Pot Size
One size larger pot (e.g., from 4-inch to 5-inch); ensure it has drainage holes.
Method
Remove plant gently; trim any dead roots; place in a slightly larger pot with fresh, well-draining soil; water lightly after repotting.
Suggestions
Repot every 2–3 years or when roots fill the pot; necessary to refresh soil and provide space for growth.
Checklist
Choose appropriate pot size; prepare fresh soil mix; handle roots carefully; water sparingly after repotting.
Advanced Care Tips
Watering Mastery
Watering Checklist
Check soil moisture before watering; water until it drains from the bottom; discard excess water from the saucer; adjust frequency with seasons.
How to Apply Water Properly
Water directly at the soil level, ensuring even saturation of the root zone; allow water to drain freely from the pot; water in the morning to allow foliage to dry before nightfall.
Watering Schedule Tips
Water thoroughly when the top 1–2 inches of soil are dry; reduce frequency in winter to every 3–4 weeks; increase in summer to every 1–2 weeks depending on heat and humidity.
Soil Improvement
Add coarse sand, perlite, or pumice to commercial potting soil; ensure no waterlogging by using pots with drainage holes.
Temperature Stress Management
Signs of Temperature Issues
Chlorosis or purple discoloration in leaves; stunted growth; bud drop; wilting despite adequate water.
Cold Stress
Slows metabolic processes; may cause root rot if soil remains wet; leaves may become soft and translucent.
Solution: Move to a warmer location; ensure soil is dry before cold exposure; use a heat mat for potted plants in drafty areas.
Hot Stress
Leaves may curl, wilt, or develop sunburn spots; growth may slow; soil may dry out too quickly.
Solution: Provide shade during peak heat; increase watering frequency; use a fan for air circulation; mist foliage lightly in extreme heat.
Fertilizing Guide
Fertilizing Checklist
Use diluted fertilizer; apply during active growth; avoid winter months; flush soil periodically.
Fertilizing Method
Use a balanced liquid fertilizer diluted to half strength; apply every 4–6 weeks during growing season (spring/summer); avoid fertilizing in fall/winter.
Common Problems & Solutions
Toxicity Warning
Cats
Non-toxicEcheveria australis is not toxic to cats. There are no known adverse effects associated with ingestion of this plant by felines.
⚠️ Symptoms:
🌿 Toxic Parts:
⚡ Toxic If:
if eaten
Dogs
Non-toxicEcheveria australis is not toxic to dogs. There are no known adverse effects associated with ingestion of this plant by canines.
⚠️ Symptoms:
🌿 Toxic Parts:
⚡ Toxic If:
if eaten
Humans
Non-toxicEcheveria australis is not known to have any toxic effects on humans. It is generally considered safe for consumption in small quantities.
⚠️ Symptoms:
🌿 Toxic Parts:
⚡ Toxic If:
if eaten
Frequently Asked Questions
Q: How often should I water Echeveria australis?
A: Water sparingly, allowing the soil to dry completely between waterings to prevent root rot.
Q: Does Echeveria australis need full sun?
A: Yes, it thrives in bright, direct sunlight but can tolerate partial shade.
Q: Can I propagate Echeveria australis?
A: Yes, it can be propagated easily from leaf cuttings or offsets.
Quick Reference

| Family: | Crassulaceae |
| Care: | easy |
| Light: | full sun to partial shade |
| Water: | every 7–10 days during activ |
Get Expert Care Tips
Download the Plantious app for personalized care reminders and plant identification!
Google Play App Store